領先一步
VMware 提供培訓和認證,助您加速進步。
瞭解更多更新:添加了 Git 子模組說明。
我過去曾談到為真正的模組化應用程式提供支援,我很高興地宣佈,您現在可以訪問 SpringSource Slices 的早期原型程式碼。
您可以從我們的 Git 倉庫訪問原始碼
git clone git://git.springsource.org/slices/slices.git
git submodule init
git submodule update
要構建 Slices 的打包版本,只需在 build-slices 目錄中執行 ant clean jar package
cd slices/build-slices
ant clean jar package
這將在 target/artifacts 中生成一個 zip 檔案,其中包含 Slices 子系統,然後可以將其安裝到 dm Server 2.0 上
安裝 Slices 只是將新的子系統新增到 dm Server,然後更新 dmServer 的配置檔案以啟動新的子系統。Slices 應該適用於任何最新的 dm Server 2.0 快照版本。我這裡使用的是 2.0.0.CI-R326-B274,我已經下載並解壓縮到我的桌面
unzip target/artifacts/springsource-slices-BUILD-20090622083953.zip -d ~/Desktop/springsource-dm-server-2.0.0.CI-R326-B274
接下來,必須更新 dm Server 的 kernel.properties 配置以包含新的 slices 子系統。開啟 dm Server 安裝的 config/kernel.properties 檔案,並編輯配置檔案配置部分以列出 slices 子系統併為配置檔案指定一個合適的名稱(我將其命名為 slices)
#######################
# Profile Configuration
#######################
profile.name=slices
profile.subsystems=	com.springsource.server.web,com.springsource.osgi.slices
profile.optionalSubsystems=
儲存更新後的檔案,你就可以嘗試 Slices 示例應用程式了。
Slices 倉庫包含一個 Spring 3 PetClinic 示例版本,我們隨著 Slices 新功能的增加不斷地對其進行增強和改進。
在使用示例之前,必須將其依賴項新增到 dm Server 安裝中。依賴項列在示例的 dependencies.txt 檔案中。將列出的每個依賴項下載到安裝的 repository/bundles/usr 目錄。接下來,使用 -clean 啟動選項啟動 dm Server
./bin/startup.sh -clean
現在是構建和部署示例的時候了。進入 slices/samples/slices-petclinic/com.springsource.slices.petclinic.host 目錄並執行 ant clean jar
cd samples/slices-petclinic/com.springsource.slices.petclinic.host
ant clean jar
然後可以透過將生成的 war 包複製到 dm Server 的 pickup 目錄來部署主機
cp target/artifacts/com.springsource.slices.petclinic.host.war ~/Desktop/springsource-dm-server-2.0.0.CI-R326-B274/pickup/
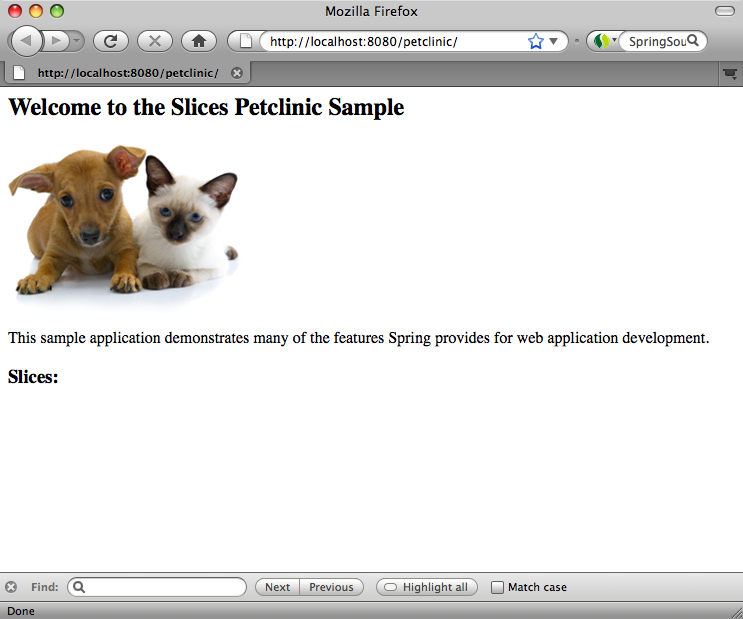
現在應該可以從 https://:8080/petclinic 訪問主機了

接下來,進入 slices/samples/slices-petclinic/com.springsource.slices.petclinic.appointments 目錄並執行 ant clean jar 來構建 appointments slice
cd samples/slices-petclinic/com.springsource.slices.petclinic.appointments
ant clean jar
現在可以透過將生成的 war 包複製到 dm Server 的 pickup 目錄來部署 slice
cp target/artifacts/com.springsource.slices.petclinic.appointments.war ~/Desktop/springsource-dm-server-2.0.0.CI-R326-B274/pickup/
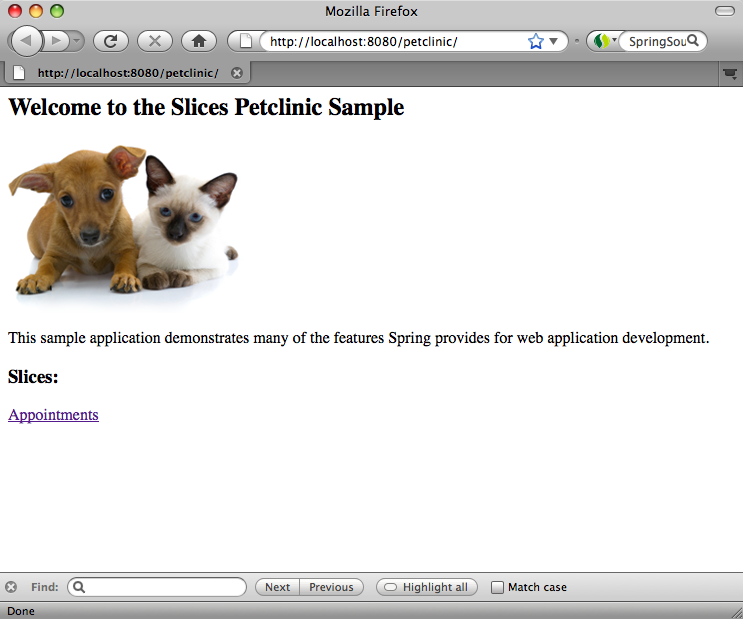
重新整理 https://:8080/petclinic,它現在將反映 appointments slice 的存在,並帶有一個新的 Appointments 連結

如果您願意,現在可以從 pickup 目錄中刪除 appointments war 包,以檢視 slice 再次消失。
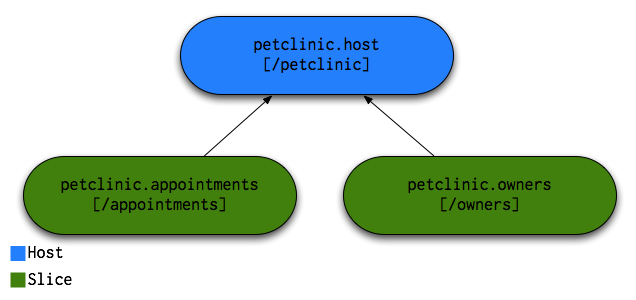
使用 Slices,您可以從多個 OSGi 捆綁包構建一個 Web 應用程式,每個捆綁包都為應用程式 URL 空間的獨立子部分提供內容。Slices 應用程式以父/子結構排列,每個應用程式最多有一個父級(稱為主機),以及零個或多個子級(稱為 slices)。我們正在開發一個簡單的 Slices 示例,它看起來像這樣

<?xml version="1.0" encoding="UTF-8"?>
<web-app version="2.5" xmlns="http://java.sun.com/xml/ns/javaee"
	xmlns:xsi="http://www.w3.org/2001/XMLSchema-instance"
	xsi:schemaLocation="http://java.sun.com/xml/ns/javaee http://java.sun.com/xml/ns/javaee/web-app_2_5.xsd">

    <filter>
    	<filter-name>host-filter</filter-name>
    	<filter-class>com.springsource.osgi.slices.core.SliceHostFilter</filter-class>
    </filter>

    <filter-mapping>
        <filter-name>host-filter</filter-name>
        <url-pattern>/*</url-pattern>
    </filter-mapping>

	<!-- Enables clean URLs with JSP views e.g. /welcome instead of /app/welcome -->
	<filter>
		<filter-name>UrlRewriteFilter</filter-name>
		<filter-class>org.tuckey.web.filters.urlrewrite.UrlRewriteFilter</filter-class>
	</filter>

	<filter-mapping>
		<filter-name>UrlRewriteFilter</filter-name>
		<url-pattern>/*</url-pattern>
	</filter-mapping>

	<!-- Handles all requests into the application -->
	<servlet>
		<servlet-name>Spring MVC Dispatcher Servlet</servlet-name>
		<servlet-class>org.springframework.web.servlet.DispatcherServlet</servlet-class>
		<init-param>
			<param-name>contextConfigLocation</param-name>
			<param-value>
				/WEB-INF/spring/*.xml
			</param-value>
		</init-param>
		<load-on-startup>1</load-on-startup>
	</servlet>

	<!-- Maps all /app requests to the DispatcherServlet for handling -->
	<servlet-mapping>
		<servlet-name>Spring MVC Dispatcher Servlet</servlet-name>
		<url-pattern>/app/*</url-pattern>
	</servlet-mapping>

  	<!-- Serves static resource content from the webapp root & .jar files such as spring-js.jar -->
	<servlet>
		<servlet-name>Resources Servlet</servlet-name>
		<servlet-class>org.springframework.js.resource.ResourceServlet</servlet-class>
		<load-on-startup>0</load-on-startup>
	</servlet>

	<!-- Map all /resources requests to the Resource Servlet for handling -->
	<servlet-mapping>
		<servlet-name>Resources Servlet</servlet-name>
		<url-pattern>/resources/*</url-pattern>
	</servlet-mapping>

</web-app>
正如您所看到的,主機可以有任何正常的 servlet 和過濾器對映,但它需要 SliceHostFilter 才能將請求路由到其 slices。
slice 是一個捆綁包,其外觀和功能類似於標準 RFC66 Web 捆綁包,只不過它沒有自己的 ServletContext。相反,slice 在其主機的 ServletContext 下執行。
Slices 的主要設計目標之一是確保 slice 開發與標準 Web 應用程式開發儘可能相似。為此,您可以使用 web.xml 以與為任何應用程式建立 Web 內容完全相同的方式建立 slice Web 內容。這是來自 petclinic.appointments 捆綁包的 web.xml
<?xml version="1.0" encoding="UTF-8"?>
<web-app version="2.5" xmlns="http://java.sun.com/xml/ns/javaee"
	xmlns:xsi="http://www.w3.org/2001/XMLSchema-instance"
	xsi:schemaLocation="http://java.sun.com/xml/ns/javaee http://java.sun.com/xml/ns/javaee/web-app_2_5.xsd">

	<!-- Handles all requests into the application -->
	<servlet>
		<servlet-name>appointments</servlet-name>
		<servlet-class>org.springframework.web.servlet.DispatcherServlet</servlet-class>
		<load-on-startup>1</load-on-startup>
	</servlet>

	<!-- Maps all /app requests to the DispatcherServlet for handling -->
	<servlet-mapping>
		<servlet-name>appointments</servlet-name>
		<url-pattern>/app/*</url-pattern>
	</servlet-mapping>

</web-app>
appointments slice 只是委託給 Spring DispatcherServlet。Spring MVC 可以在 slice 中正常使用。
slice 可以透過簡單地引用 slice 本身不存在的資源名稱來訪問主機捆綁包中的資源。如果 slice 想要訪問主機中的資源,即使它自己有一個同名資源,它也可以使用 host: 字首來訪問
ServletContext context =  getServletContext();
context.getResource("host:/WEB-INF/some.config.xml");
slice 需要定義它想要附加到的主機,並使用 Slice-Host 清單頭來完成。 Slice-ContextPath 頭定義了 slice 處理的 URL 部分
Bundle-SymbolicName: petclininc.appointments
Slice-Host: petclinic.host;version="[1.0, 2.0)"
Slice-ContextPath: /appointments
主機可以在沒有附加任何相應 slice 的情況下執行。當與主機匹配的 slice 安裝到伺服器中時,該 slice 將附加到主機。此時,與新附加的 slice 的 Slice-ContextPath 匹配的主機 URL 部分的子部分將路由到該 slice。
當 slice 被解除安裝時,路由到 slice 的 URL 空間部分現在將直接路由到主機。透過這種方式,您可以在主機中建立內容來處理缺失的 slices。
截至本文撰寫時,Slices 程式碼庫支援 Slice 中的以下功能
我們正在為 Slices 開發許多有趣的新功能,包括
如果您有任何功能建議或發現錯誤,請隨時 在我們的 JIRA 上提出問題。
如果您想密切關注進度,可以關注我們的 Git 倉庫和我們的 #dmserver Twitter 標籤。